I first found out about this tool on a trip to Sweden and asked what it was used for. Unfortunately, it was not actually in use at the time, but an explanation of how it worked was given, and I duly filed the information away for the time being.
A few years later, interest in the tool was renewed, and I decided to give it a try, asking Doug to mount a bar on the ceiling to use in beaming warps onto my four-shaft Fanny (Leclerc) loom. Since then, I've used it with consistently good results whenever I'm beaming more than 5 yards.
Recently, I asked a dyer to paint some scarf warps for me, with the intention of using the Fanny to weave them. When I received the warps, however, I decided I really wanted to use my AVL for several reasons, 16 shaft twills being one of them.
Since I already had a bar mounted at the rear of the AVL, which I use to suspend repair threads


The bar is actually too close to the loom to use for this application, but I decided that I could make it work and set about beaming the first of the painted warps.
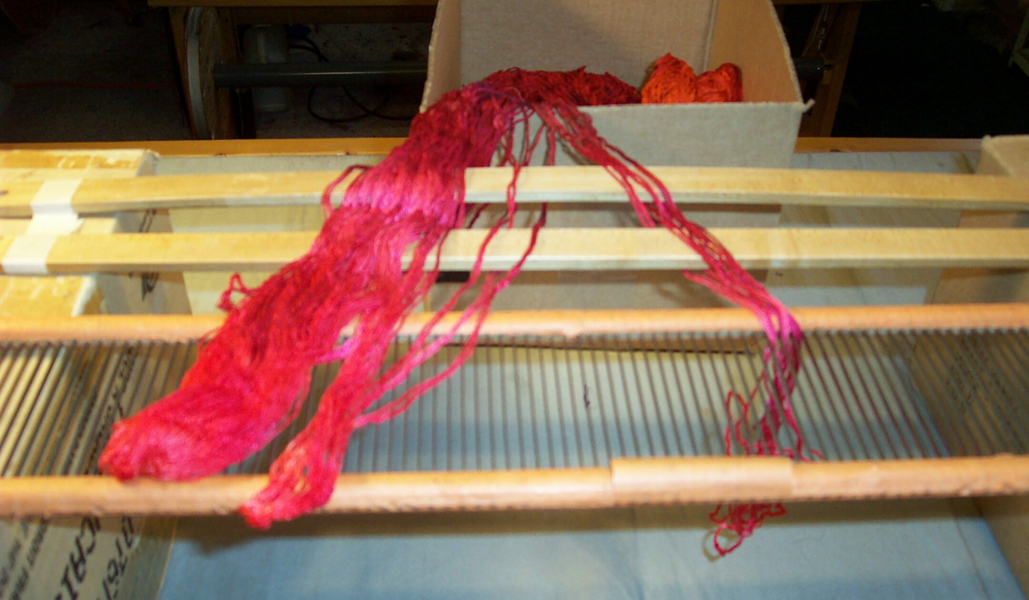
No matter how careful the dyer is, the warps will get messed up, and I was very pleased with how well the warping valet helped to get the painted warps straightened out and rolled onto the sectional beam of my AVL.
I begin by rough sleying the warp into a reed.

Since I have had a couple of whiplash injuries, I find it uncomfortable to work with my hands extended away from my body. Instead of using the traditional reed and lease stick holders, I use a couple of small boxes and bridge them with the reed placing the lease sticks "behind" the reed.
In this instance, I am using a 5 dent reed. The warp was wound with two ends at a time, so I pull each loop consisting of the two threads (i.e. four ends) through each dent.
It is very important not to cross the threads over each other but to take each loop in sequence.
After the warp is completely rough sleyed


and place the reed and lease sticks on top of the box containing the warp and carry it all to the back of the loom.

The loops are given a jerk to open a "shed" and the rod from the back of the loom is inserted. Since the AVL has a sectional beam, I bought some rod from a local hardware store and attached two loops to the beam to hold the rod and warp.

Notice that the loops are placed in alignment with the outside edge of the warp, not at the ends of the rod. This prevents the rod from bowing.
With a very tight choke tie near the cross, the warp threads in the cross do not shift very much during all this handling.

My loom has a half-yard second beam, and I cover it with plastic to keep the rakes from grabbing onto things.
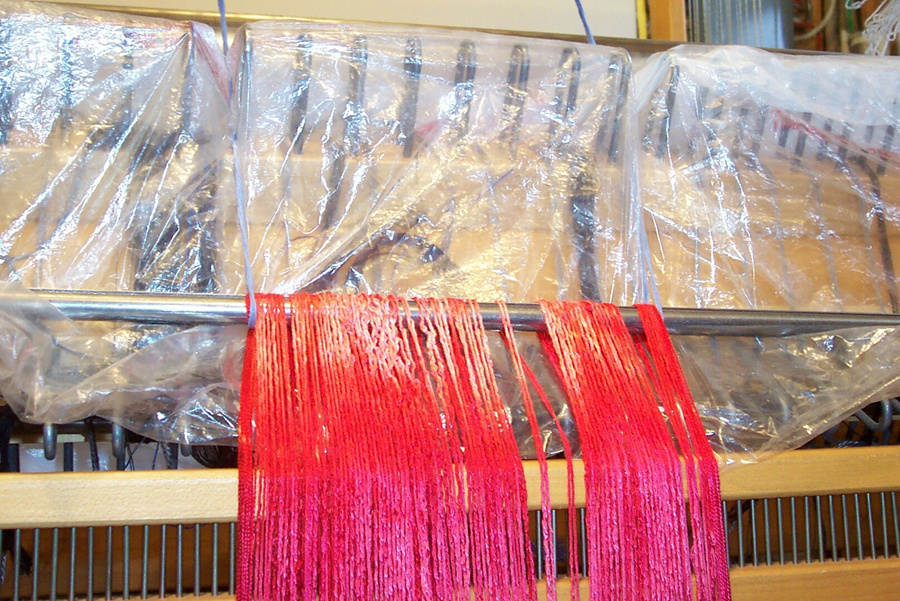
When the warp is lined up with the sections into which it will be beamed, I then untie the choke tie near the cross. Notice the lease sticks are on the side of the reed away from the loom.

This is not traditional Scandinavian technique, but I find the lease sticks very useful in helping to clear snags and keep tension on the threads while beaming.
After the choke tie is removed, I pass the warp under the rail on which the tension box sits and over the warping valet (bar suspended from the ceiling)
attaching a jug of water to the chain.
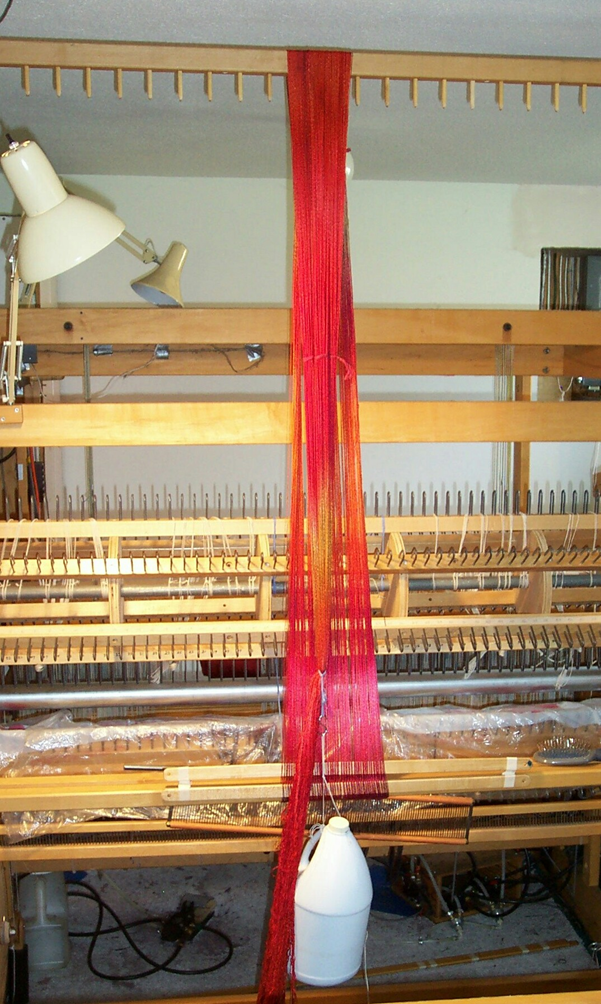
The tension box rail on my loom is permanently mounted so it holds the tension of the warp without any difficulty.
The reed stays between the tension box rail and the sectional beam, while the lease sticks stay between the tension box rail and the warping valet.

In order to suspend the water jug from the warp, I loop a string around the chain with a Lark's Head, and hang an "S" hook from the string. The water jug has a long cord attached to the handle of the jug with a couple of loops knotted into the cord, one near the handle and one near the end of the cord.

When the jug is hanging off the warp, I move the lease sticks up as close to the warping valet as it will go without snagging or snarling in the warp ends.

The reed is swiveled to help the threads align with the sectional rakes. The sectional rakes keep everything in place, and no warping sticks or paper packing is required.

Since the warp is already measured, I simply pull on the rakes to wind the warp on. When the lease sticks reach the tension box rail, the water jug is taken off the hook, the string attaching it to the warp is removed, and the warp is given a shake and a snap. If there are still areas of threads that are loose or tangled, a few swipes with a brush quickly ease them out. (Note: I don't use a brush on a fragile or highly textured yarn, but this smooth rayon doesn't mind a little judicious brushing and straightens out the warp much faster than by finger combing alone.)

When the end of the warp is nearly to the warping valet, the jug of water is then hung from the warp by the loop near to the end of the cord.


Ease the hook over the warping valet, and continue beaming until the water jug can go no further, and remove the jug, hook and string attaching it to the warp.

I now transfer the cross behind the reed. Notice my lease sticks are quite wide. When you tip these lease sticks up to form a shed, the wider-width stick will make a larger shed to slip the threading lease stick into on the other side of the reed.

Since I have a second beam on the AVL, this new lease stick sits very nicely on top of the second beam.
Since the warp is narrow, I use a shorter temporary set of lease sticks for beaming and put longer ones in to thread from.
After you have the threading lease stick inserted on the loom side of the reed, remove the original shorter lease stick on your side of the reed that you have just tipped up to form the shed for the cross transfer. Then tip up the second original lease stick to form the second half of the cross and insert the longer lease stick on the loom side of the reed. Again slip this lease stick up onto the second beam next to the first longer lease stick.

I use the clamps from the Purrington Angel Wings to secure the threading lease sticks

The lease sticks are then slipped through and suspended from the loom castle between the beam and the heddles in preparation for threading.

I use the longer lease sticks here because they are easier to suspend in the loom for threading.
Although this is most definitely not the "traditional" method of beaming using the warping valet, it works very well for these painted warps on my AVL with the sectional beam.


2 comments:
Laura, I'm a rug weaver, using the Harrisville Rug Loom. I use a heavier warp than I think you do, 8/5 Linen Warp. Do you think this method could be used for this type of warp? Also, I usually make 3 bouts of warp on the warping board and my warps are about 38 inches at the reed. One more item, I like to warp front to back, reed and then heddles, tie onto back beam and then wind on, usually with paper.
Thanks, Carol Irving
This method works 'best' if the loops are kept intact, the warp beamed, then threaded and sleyed. I can't speak to using the valet if the loops are cut, sleyed, threaded, then tied and then beamed. I would think there would be 'issues' since the warp ends will not all be continuous and intact. Otherwise, I have used the warping valet for linen and had no issues. The warp *does* need to be beamed under tension, especially linen.
If I have more than one warp chain, I will use one jug per chain.
Post a Comment